Managing Products
Collect includes a built-in Inventory feature that lets you save Items with a name and price for quick addition to transactions. Items are not tracked inventory -- they're shortcuts for common products and services that speed up your workflow.
You can organize Items into Groups, sync your Stripe Product catalog, and add images to both Items and Groups.
You need the Inventory - Use permission to view and add Items to transactions, and the Inventory - Manage permission to create, edit, or delete Items and Groups. Admins have full access by default.
Items
An Item is a saved product or service with a name and price. When processing a transaction, switch to the Inventory tab to browse and tap Items to add them.
Creating an Item
Main Menu → Inventory → Add Item
- Enter a Name and Price.
- Optionally assign the Item to a Group.
- Optionally add an Image (cropped and optimized automatically).
- Save the Item.
Editing and Deleting Items
From the Inventory screen, select an Item to edit its details, change its Group, update its image, or delete it. Deleting an Item does not affect past transactions.
Items and Groups are stored on your account, not on your device. Any changes you make -- editing, reordering, or deleting -- are reflected for all users on the account immediately.
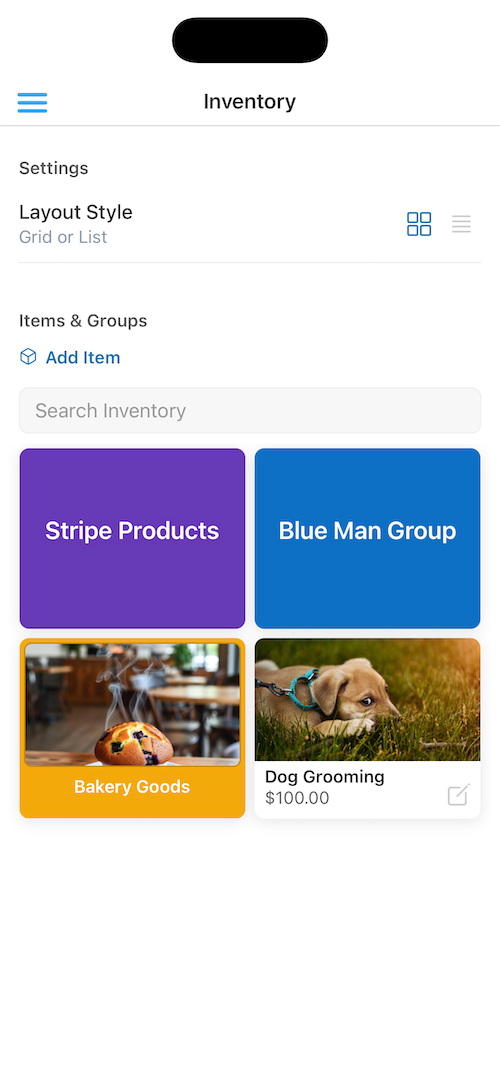
Inventory management with Groups and Items
Groups
Groups let you organize your Items into categories. Think of them as folders -- each Group contains its own set of Items.
Creating a Group
Main Menu → Inventory → Add Group
- Enter a Group Name.
- Choose a Color for the Group. This color is used as a visual identifier throughout the Inventory screen.
- Optionally add a Group Image.
- Save the Group.
Editing and Deleting Groups
Select a Group to edit its name, color, or image. Deleting a Group will also remove all Items within it.
Stripe Product Sync
If you have products in your Stripe account, Collect will automatically bring them into your Inventory. Synced Products appear in a dedicated Stripe Products group, visually distinguished with Stripe branding.
Key details about synced products:
- Product images from Stripe are displayed automatically.
- The sync is managed by the server and runs periodically to keep your catalog up to date.
- You can trigger a sync manually from the Web Dashboard.
Using Inventory During Transactions
When starting a transaction, you can switch between Custom Amount (manual entry) and the Inventory Items tab. The Inventory tab shows all your Groups and Items in either a grid or list layout.
- Tap a Group to browse its Items.
- Tap an Item to add it to the current transaction. Adjust the quantity as needed.
- Use Search Inventory to find Items by name across all Groups.
The layout (Grid or List) can be toggled from the Inventory screen. On tablets, the transaction summary appears alongside the Inventory for a side-by-side workflow.
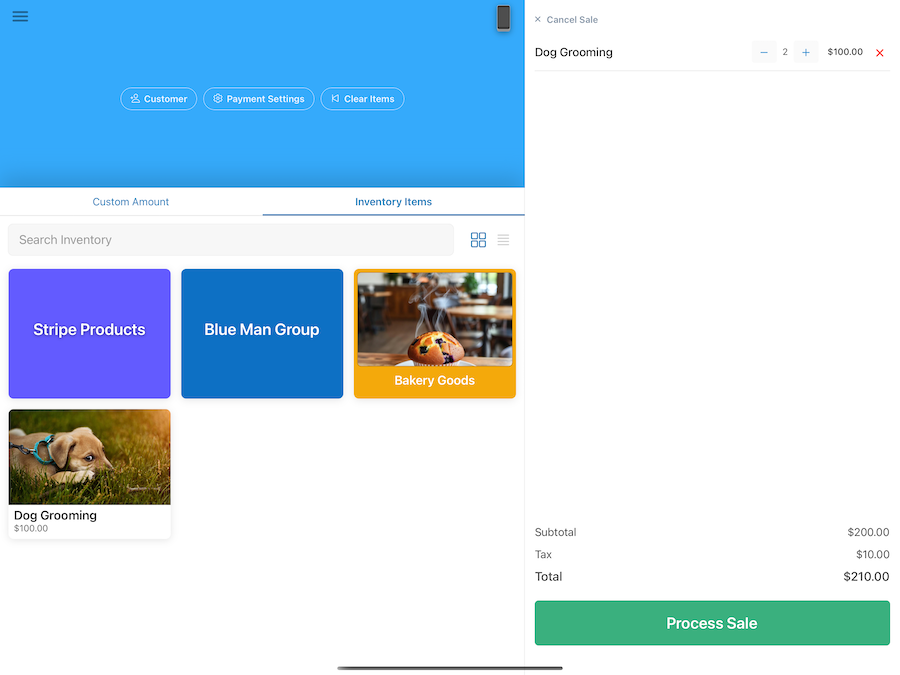
Browsing Inventory while building a transaction (tablet)
Images
Both Items and Groups support images:
- Collect Items: Upload an image directly from your device. Images are automatically cropped and optimized.
- Groups: Upload an image that represents the category. Group images appear alongside the Group color.
Managing from the Web Dashboard
Everything described above can also be managed from the Web Dashboard, including creating and editing Items and Groups, uploading images, reordering Items, and triggering a Stripe Product sync.
See the Dashboard documentation for more details.